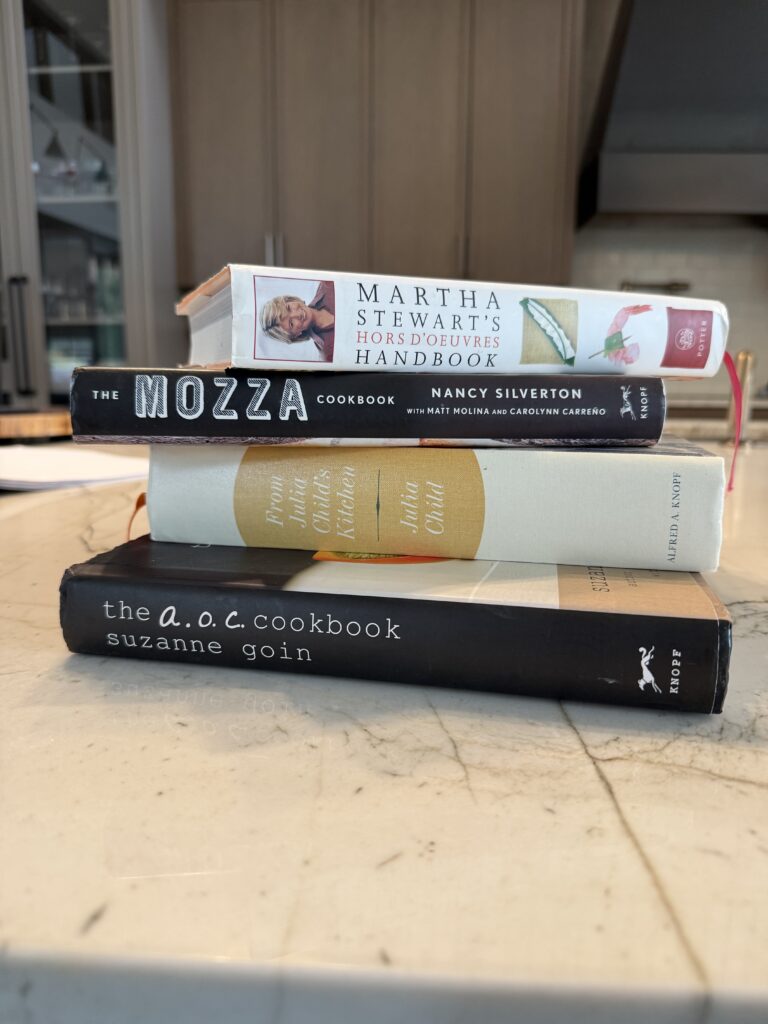
Build a Board – Make Your Own Charcuterie Boards
Birthday on Board: Snack Boards and Clay Crafts

When my nieces and daughter got together to celebrate my mom’s 78th birthday, we knew we wanted to do something together that was creative, cozy and full of love. We came up with our “Build a Board” party. Party involved a craft night, potluck and everything my mom would love.
The kids in our family call my mom Bama as do most people that have gotten to know her since she became a grandma. There isn’t a better gift we could have given her than time with her family.
Here’s how you can host your own Build a Board Party.
Must Have – The Party Essentials
For a great party you best Must Have is the people you love. Here’s a few more that will help.
Supplies
- air-dry clay
- rolling pins or wine bottles
- parchment paper
- clay tools
- Mod Podge, paint brushes and fine sandpaper ( for take-home finishing)
- a long table for crafting and grazing
The Call to Celebrate – Invitations
This was a family gathering so we kept it very casual and sent out a fun little group text with the theme and instructions.
- Bring a themed board (potluck style)
- Dress comfy but of course cute – instaworthy is always important
- Plan on getting your hands messy.
Style the Scene – Decor and Ambiance
Due to limited space at my mom’s place we served our boards first before we got crafting. We kept it simple with a white table cloth, the craft supplies and the grazing boards. If you have the space, fresh flowers in small vases or herbs in pots would go with the organic theme of working with your hands.
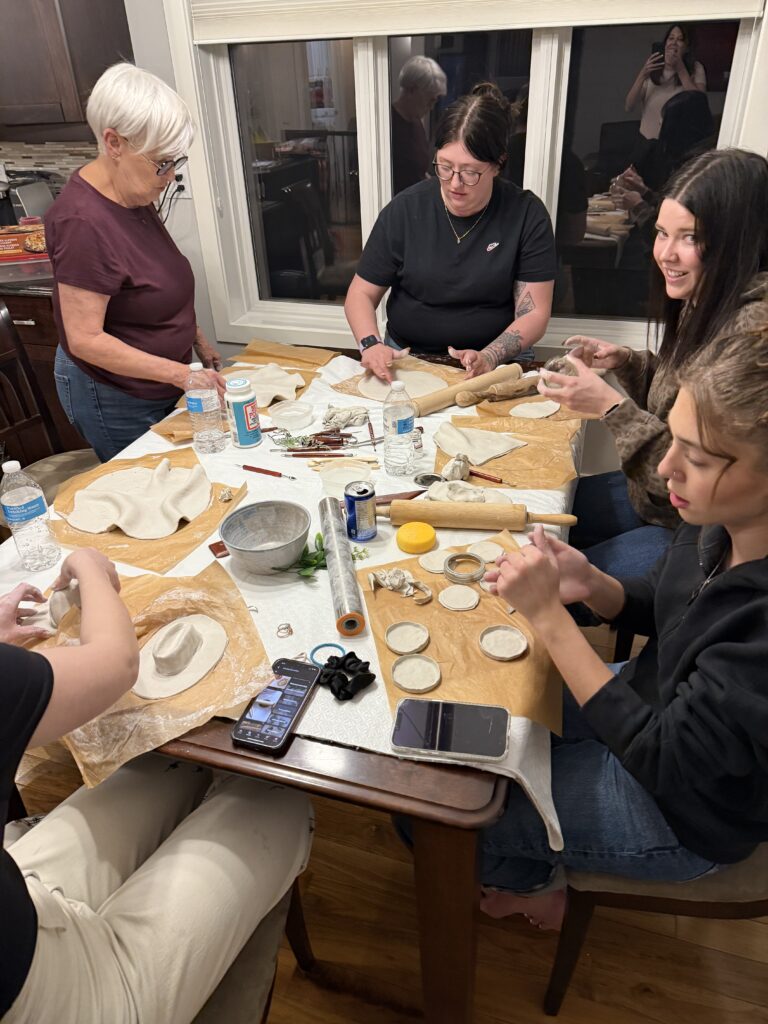
Once it was time to craft; we set everyone up with a station that had their name, clay and supplies were all just laid out in the middle of the table.
Sips and Bites
The real star of the night (Besides Mom/Bama); the boards. Everyone had a lot of fun coming up with what theme they should bring. There was TOO MUCH FOOD! Tell everyone to keep it small.
Sips
We brought over our Bartesian. It is perfect for a mixed generational crowd. We ranged in age from 18-78. You can choose if you’d like a mocktail or a cocktail and its perfect for entertaining with it’s easy to use options and so much variety.
Bites
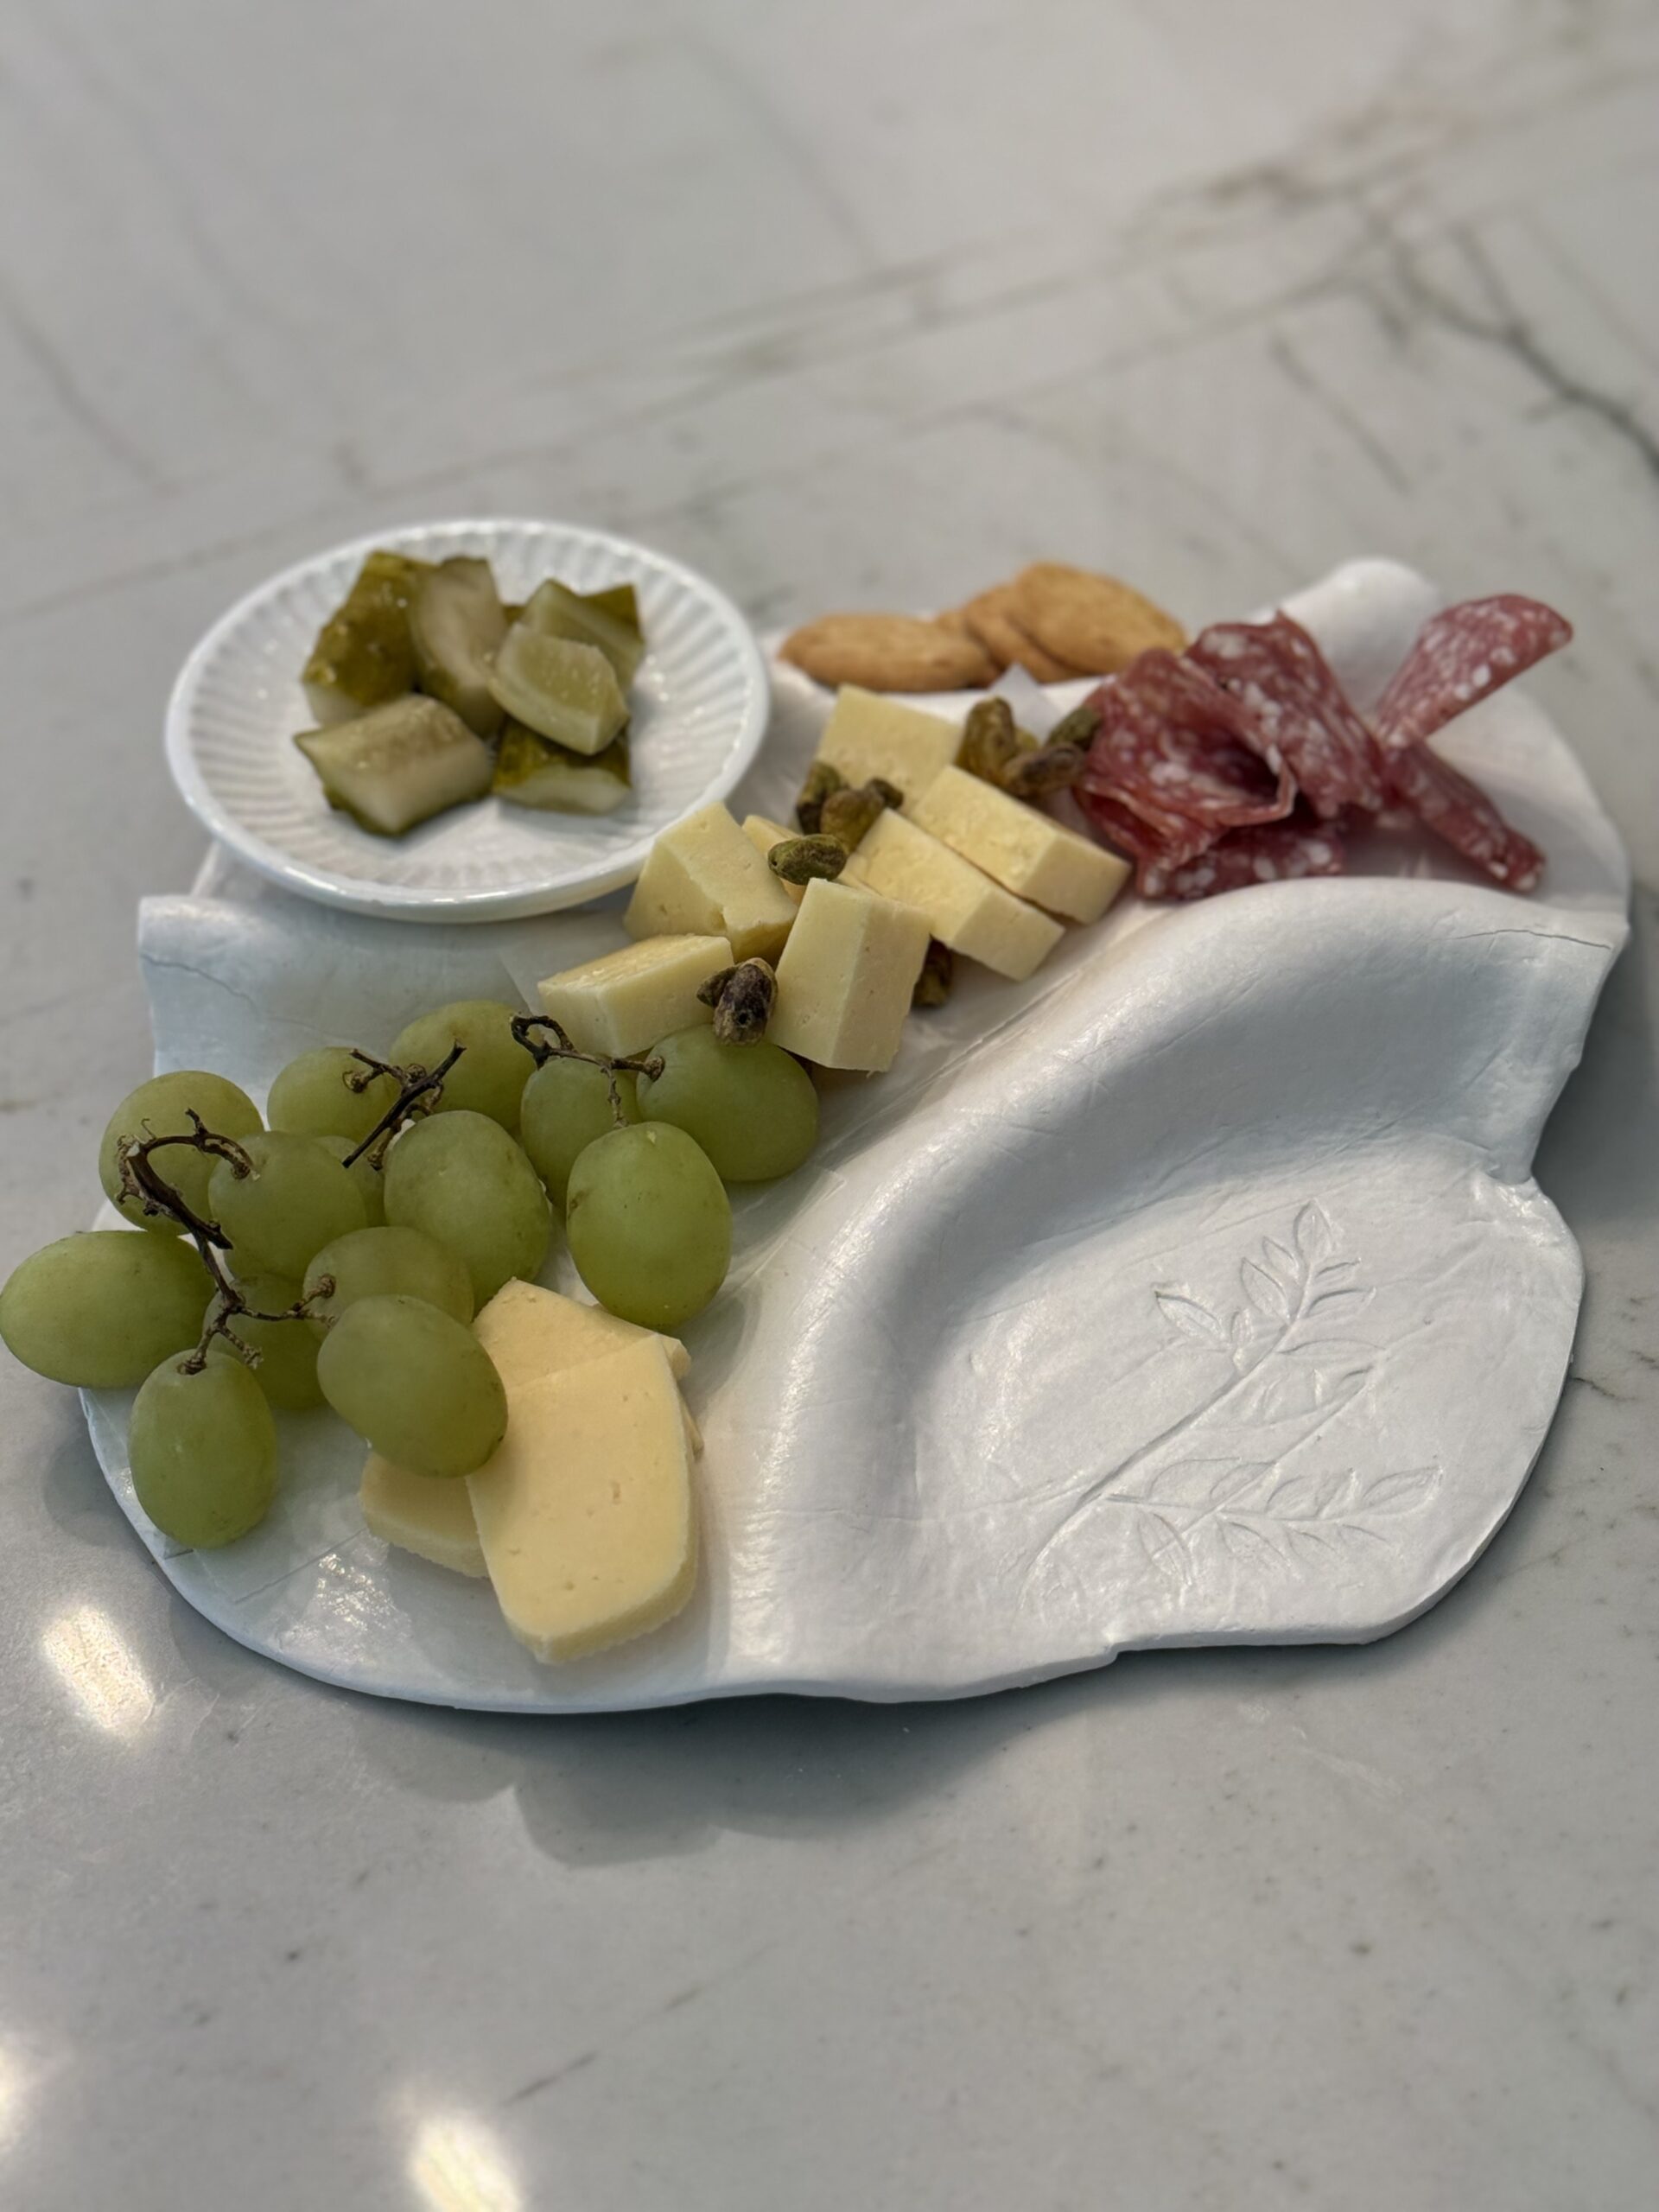
The potluck boards made this party so much fun and very affordable. The days leading up to the party were full of text messages talking about what we should each choose as a theme. The Birthday Board is a must.
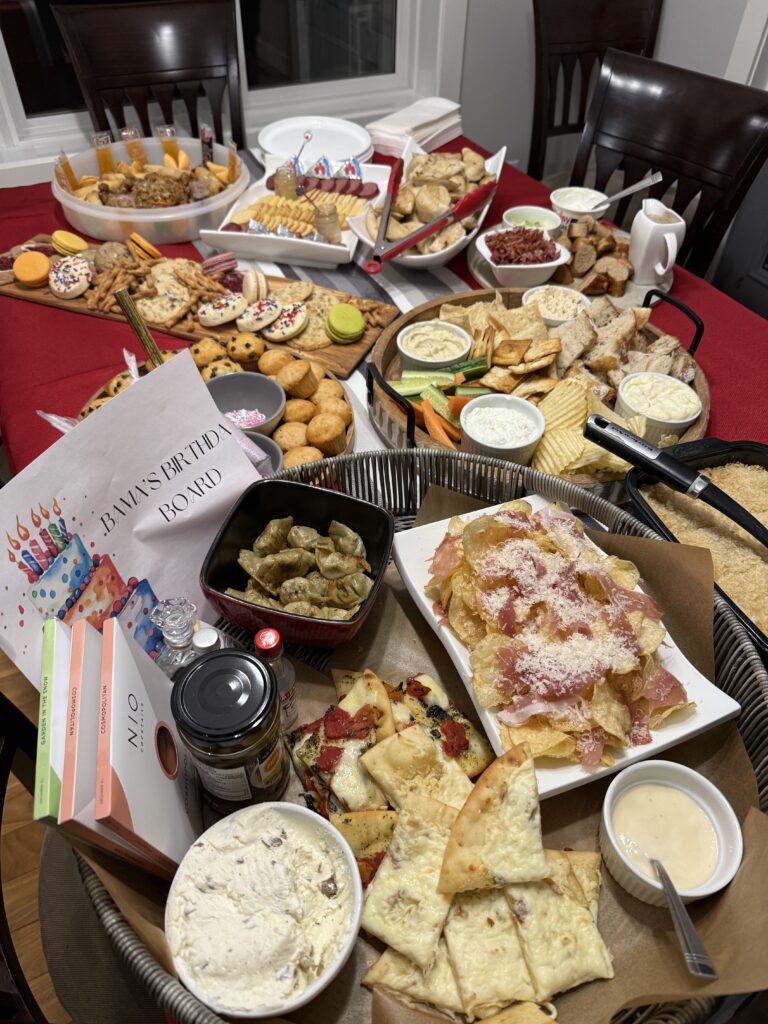
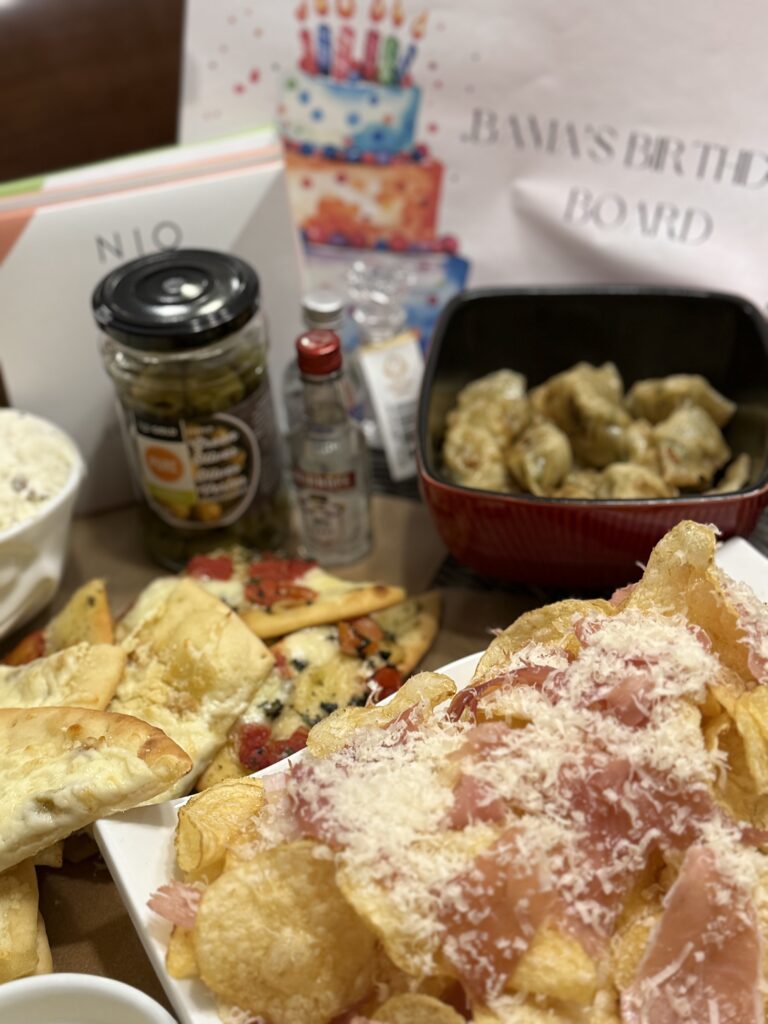
The Birthday Board – This was a spread of all of Mom’s favourite things; it doesn’t look very cohesive but its special and fun. I made a sign that said “Bama’s Birthday Board” I had asked each of the kids the week before to tell me once of Bama’s favourite foods so it was fun to see what they chose. It ranged from chips, to pot sticker, some vodka, olives and flatbreads.
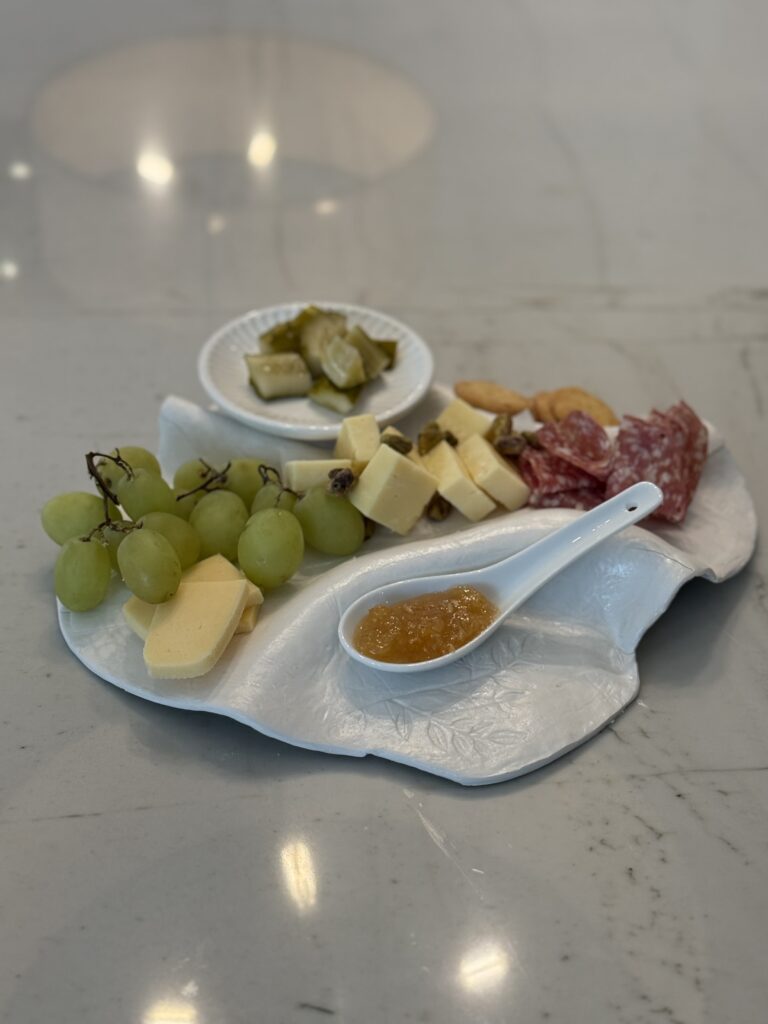
Traditional Charcuterie – This is a staple; classic meats, cheese, olives and crackers.
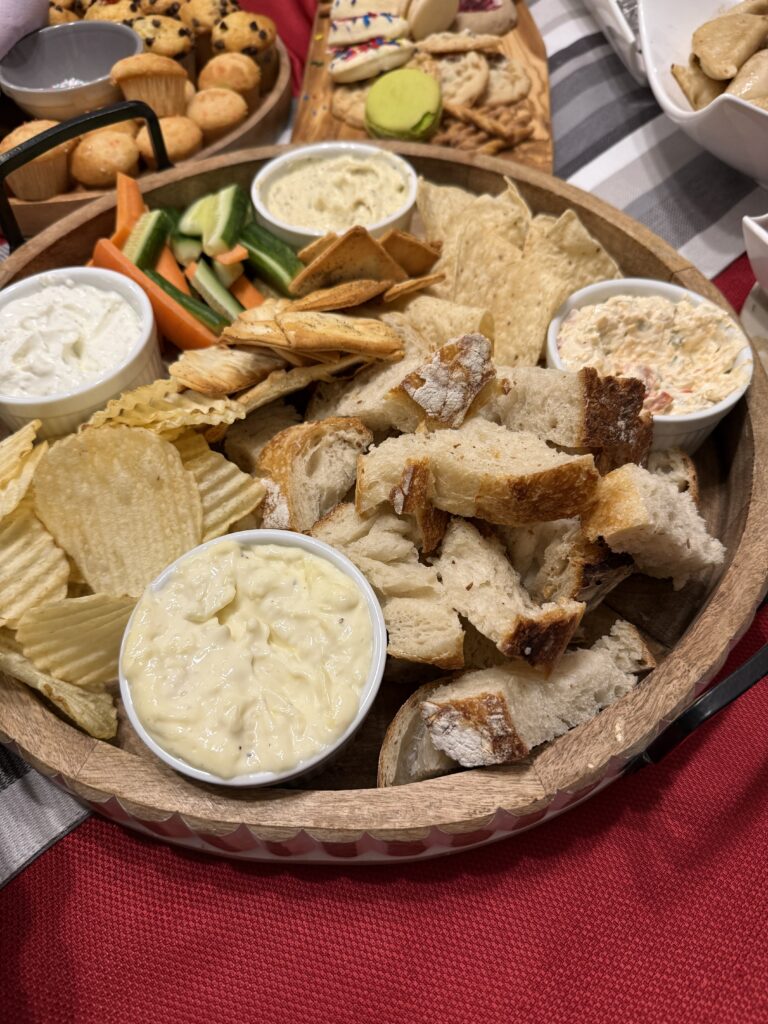
Dip Board – Ashlin is currently a sour dough expert; she paired some fresh baked sourdough with different dips; some fresh veggies, crackers and chips.
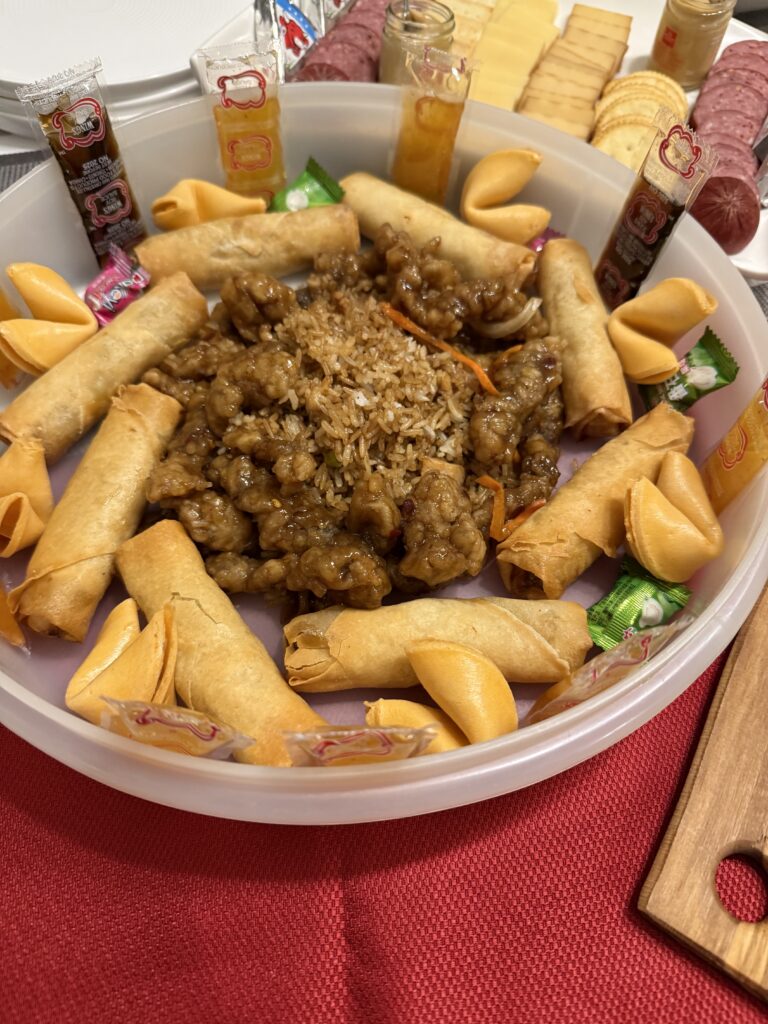
Chinese Board – My niece that made this one was quick to tell me she was ordering take out and putting it out on the board. That’s the fun in this; it can work for anyone. Do something fancy, heat up some frozen foods or throw some take out on your board. The options are endless and stress free.
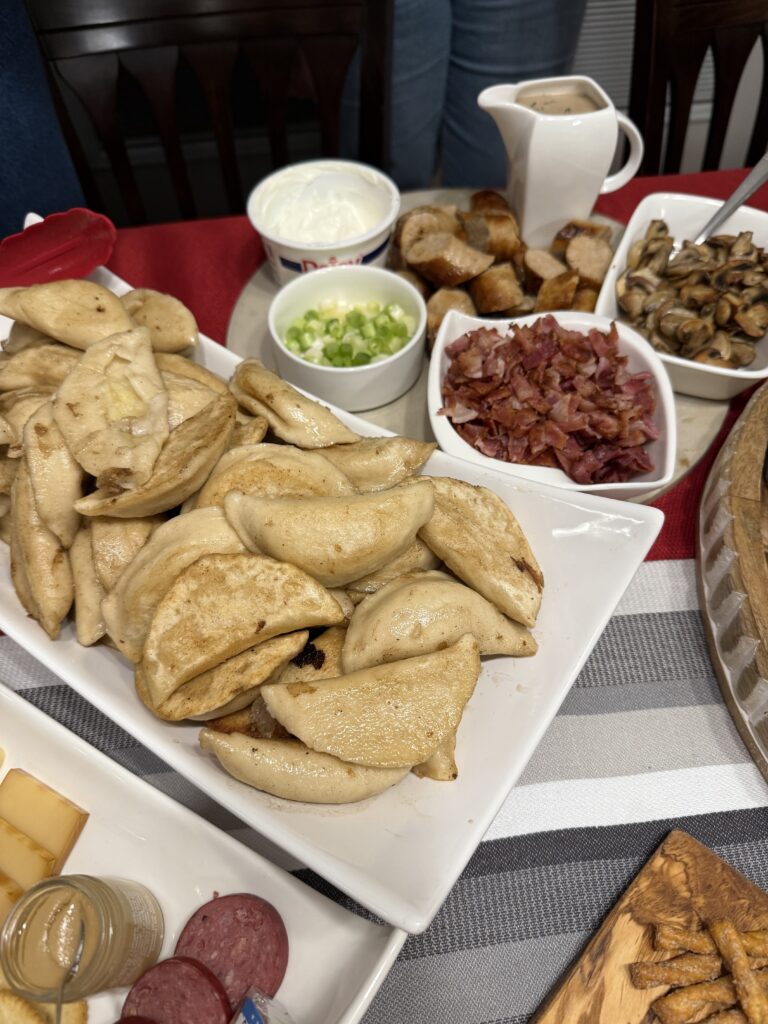
Perogy Board – Hot perogies, with mushroom dill gravy, sour cream, fired mushrooms, green onions, crispy fried bacon and sliced up Ukrainian Sausage. This was Bama’s board and it was a pretty big hit.
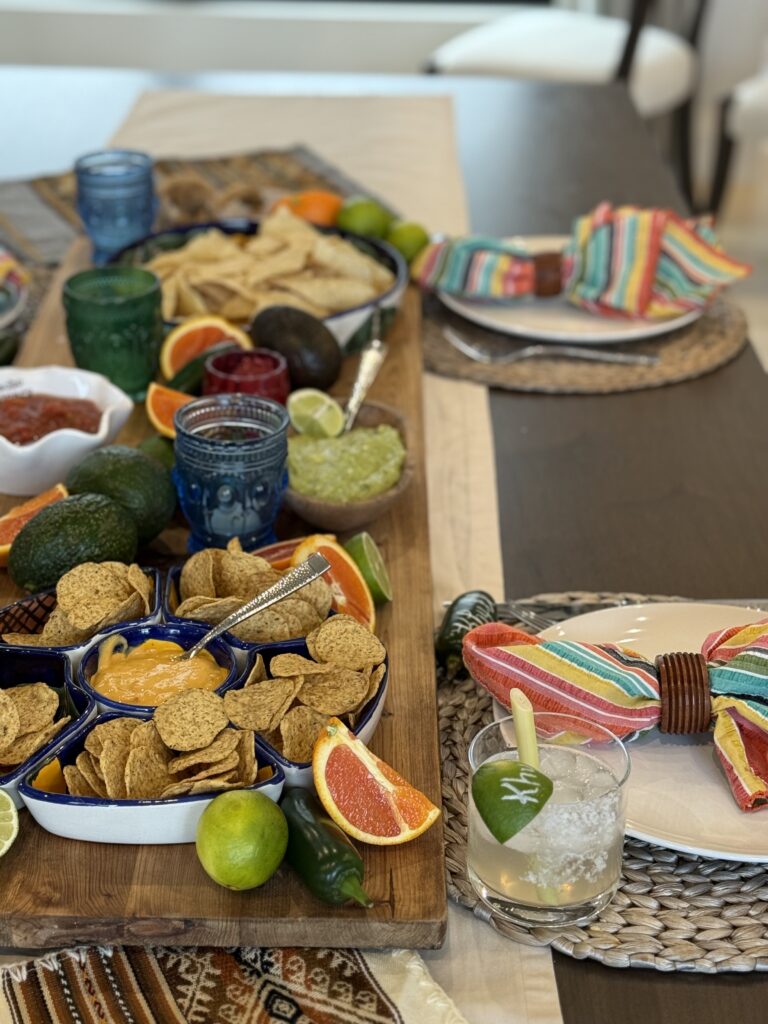
Taco Board – Mini tortillas, fillings, salsa and sour cream. You can source this one from the frozen section or do homemade. Do the version that brings you joy.
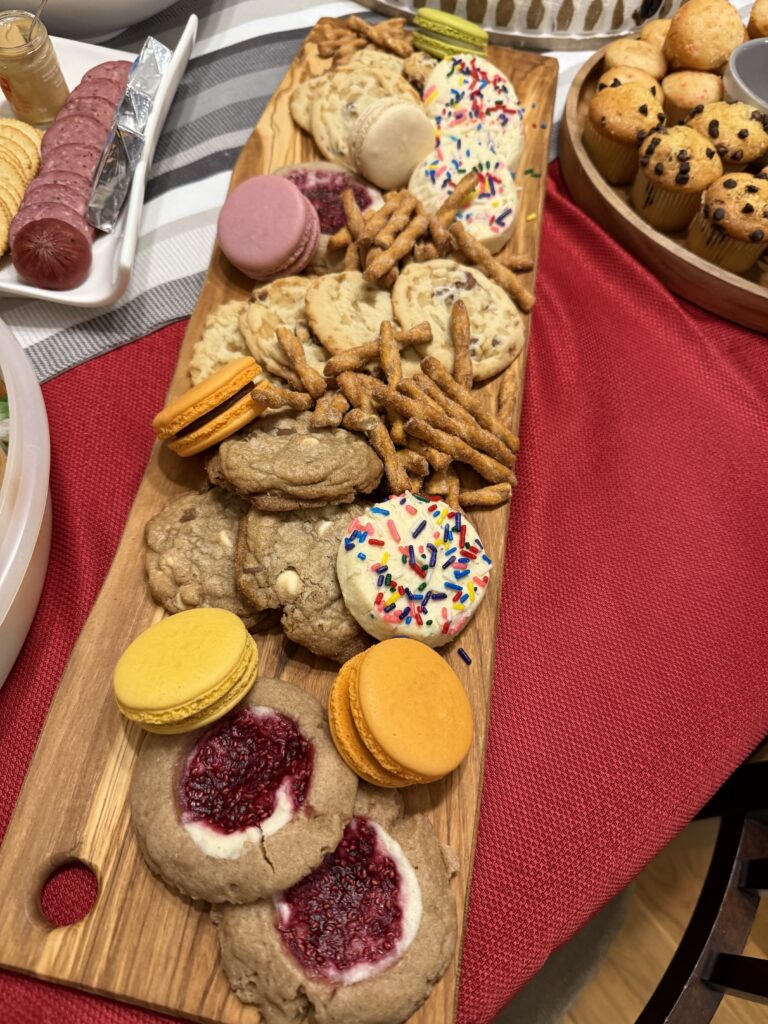
Dessert Board – There’s a sweet tooth in our family and I had a giggle when she signed up first for a dessert board. She did a long board of homemade cookies with a few store bought ones, sweet cinnamon pretzels and macarons. It was colorful and very sweet.
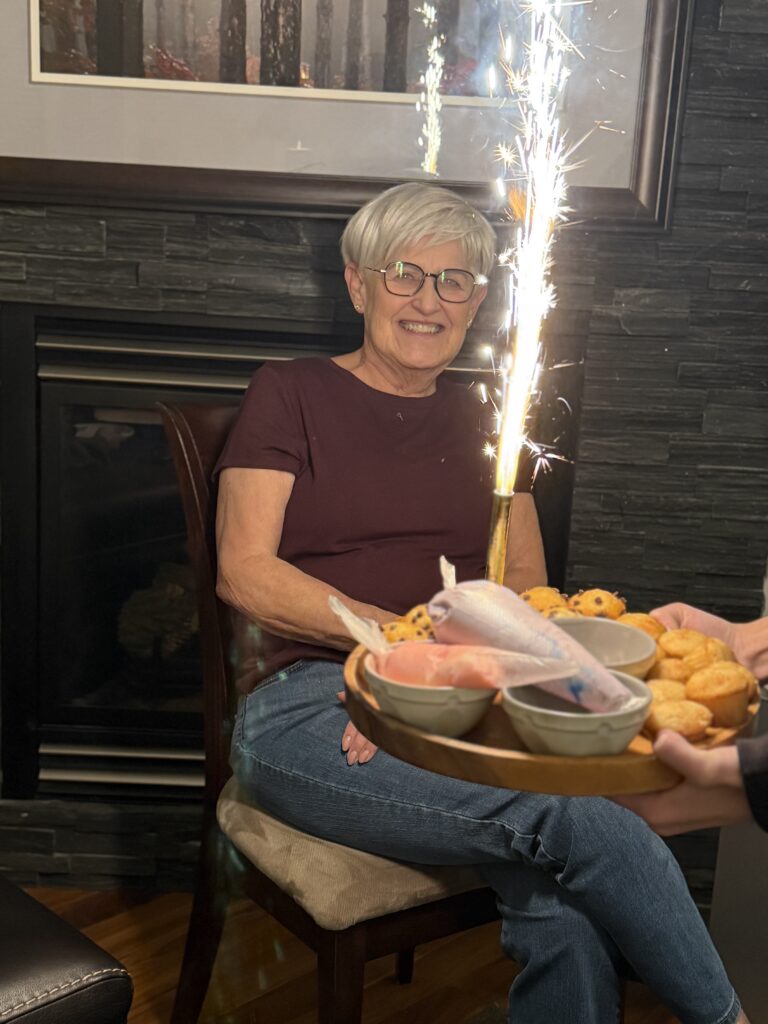
Cupcake Board – This is another quick and easy way to celebrate a birthday. I baked some cupcakes; bought some mini chocolate chip muffins, and put 3 different types of sprinkles in small pretty bowls. We offered 2 different colours of buttercream icing that I put in a decorating bag. I cut the ends just before serving so they were easy to transport. A great big sparkler in the middle for singing Happy Birthday and then you’ve got a build your own cupcake board.
Finishing Touches – Activities
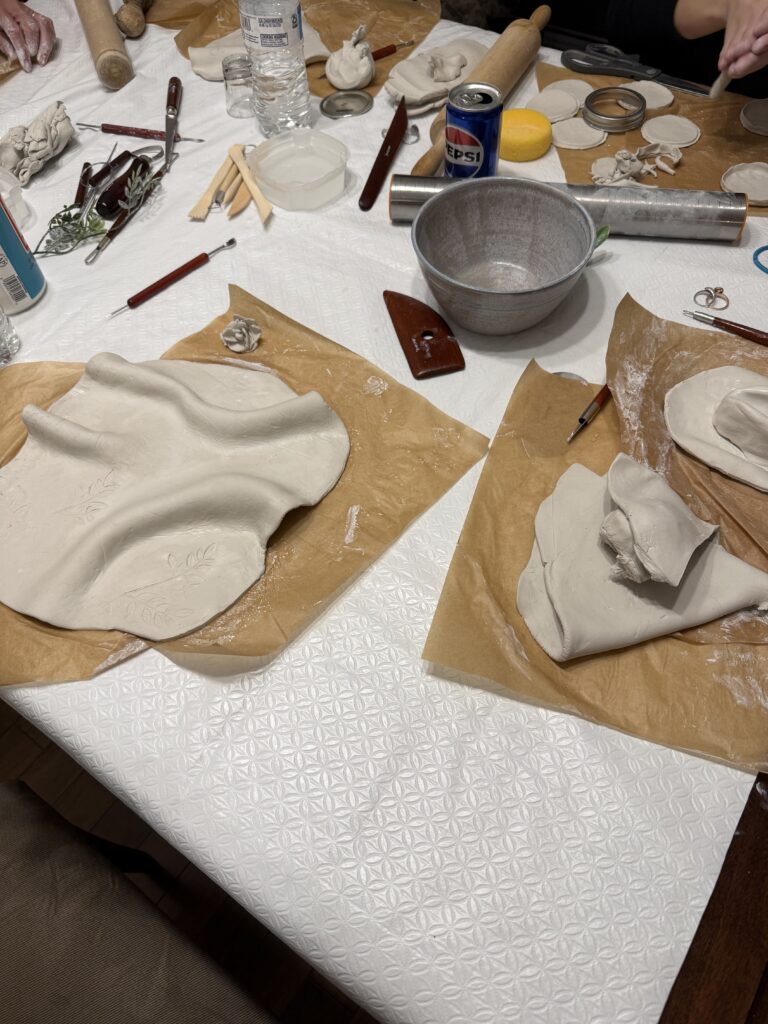
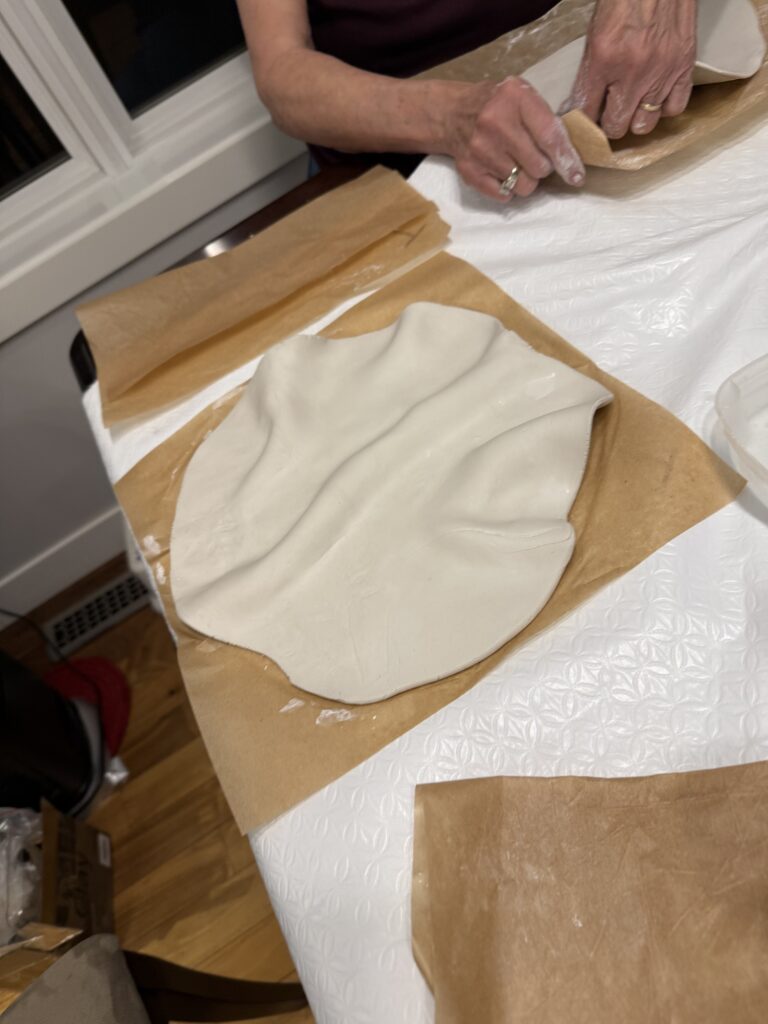
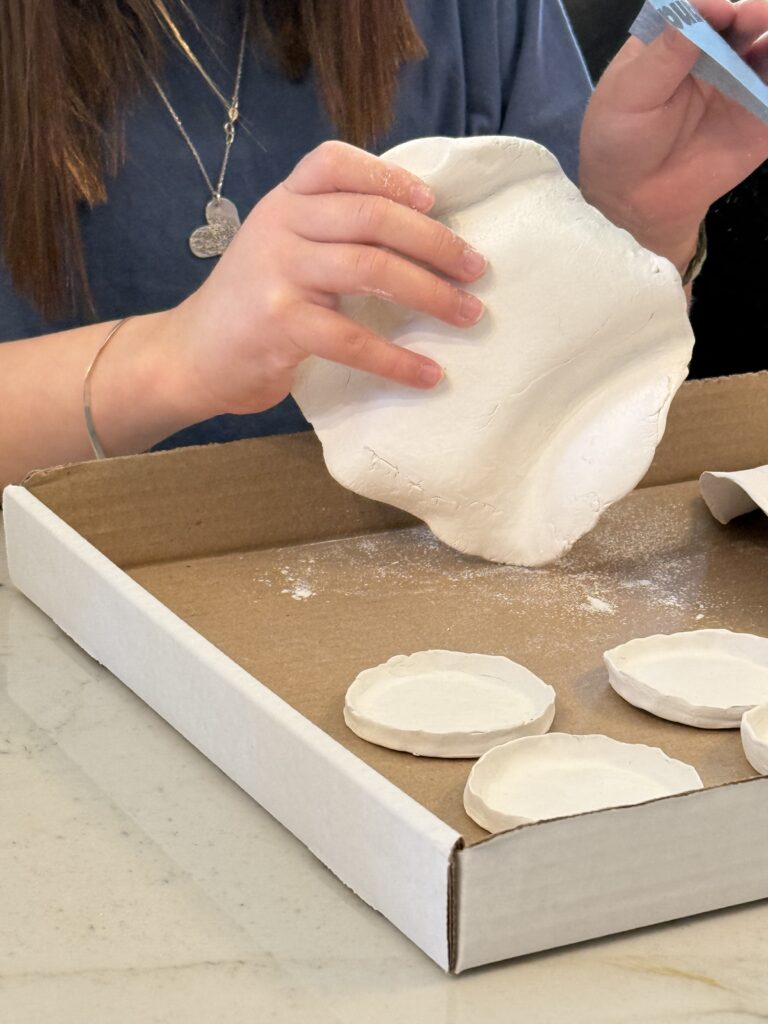
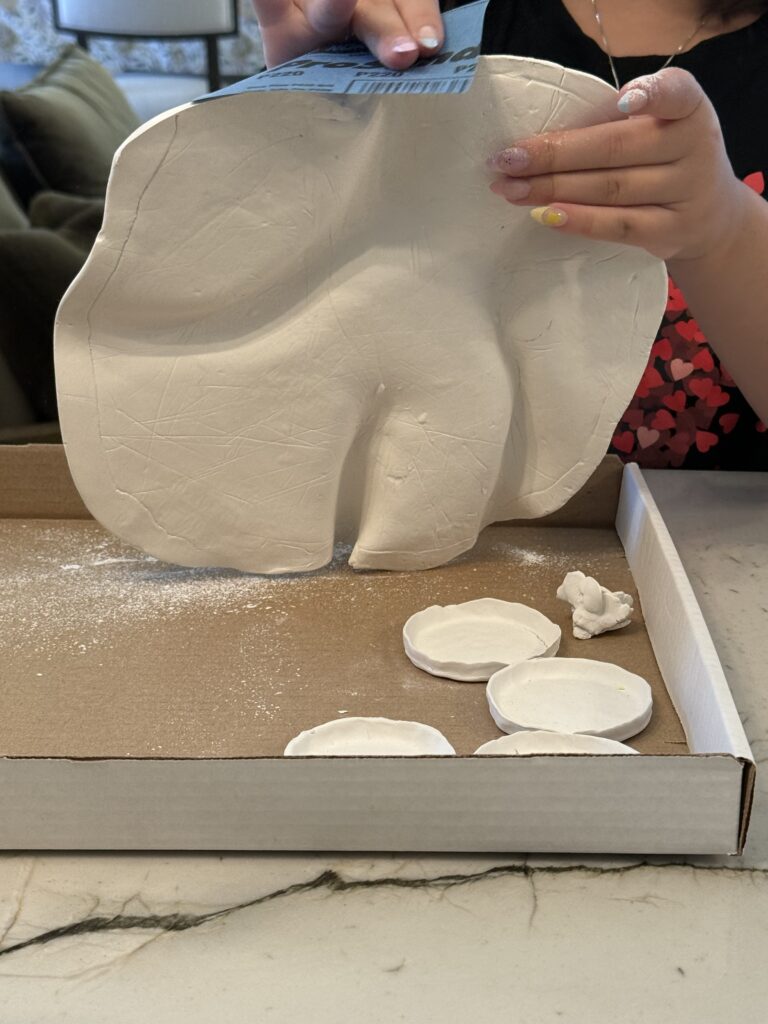
Build Your Board – Using air-dry clay, everyone had a piece of clay that they rolled out and shaped into their own custom charcuterie boards. Some of us went for abstract while others made round ones or tiny bowls/plates. Everyone’s was unique and none of us are winning any art awards but they really did turn out great. For future use we will use parchment paper on them to make sure they are food-safe despite buying a food safe mod podge.
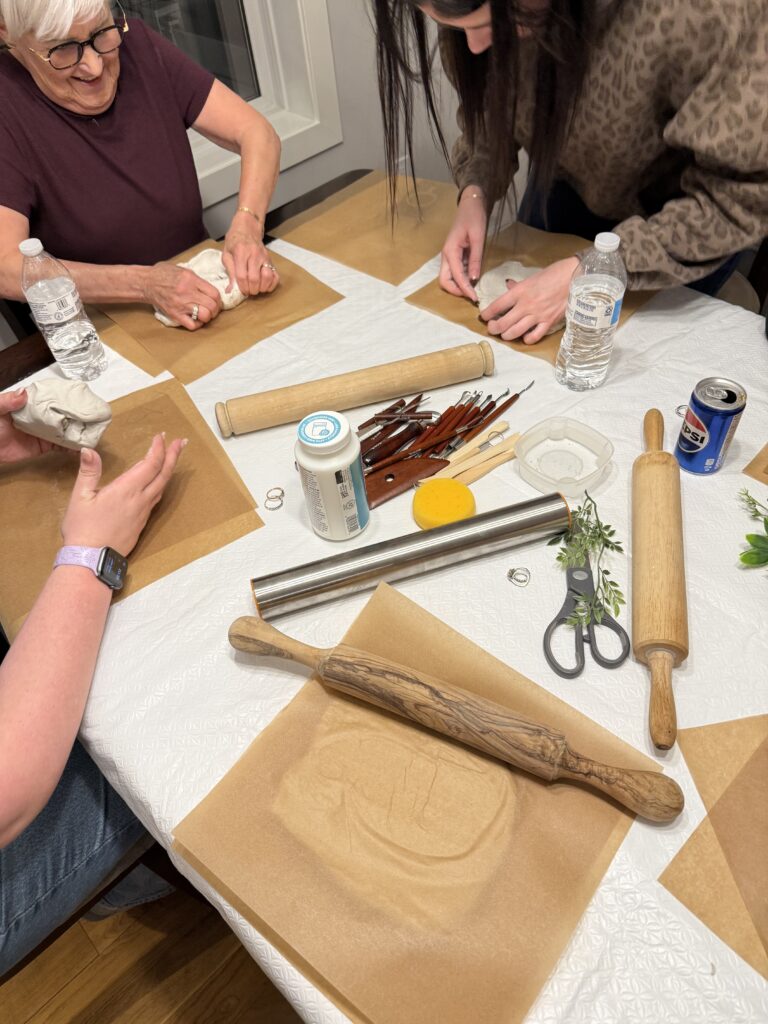

- Prep your Station – Set each spot with a piece of parchment paper, a ball of clay, a rolling pin and some shaping tools butter knives and cookie cutters work).
- Grab a chunk of air-dry clay. A ball larger than a grapefruit works well for a medium sized board.
- Roll it out. – Using a rolling pin or a wine bottle to flatten the clay to about 1/4 inch thick. Aim for an even surface but don’t worry about about perfections – we’re going for organic shapes.
- Shape Your Board – Cut out your board shape using a plastic knife or clay tools. Circles, ovals or wavy-edge rectangles all work beautifully. You can also use cookie cutters, to make handles or decorative cut outs. We created dips and waves in our boards to create physical spaces between the food we plan to place on our finished product.
- Add Texture and Details (optional) – Use stamps, lace, textured rolling pins to create a pattern. We used artificial plants. You can also pinch the edges slightly for a raised border.
- Let it Dry – Air-dry your board on the parchment paper for 24-48 hours, flipping once if needed to ensure even drying.
- Smooth the Edges – Once it is completely dry, lightly sand the edges or any rough spots with fine sandpaper. If you want to paint your board you need to do it now before you seal it with Mod Podge.
- Seal It – Apply a thin coat of Mod Podge using a paintbrush to seal the surface. Let it dry fully before use.
- Use Parchment when Serving Food – Since these aren’t food safe on their own we recommend always placing parchment paper or a napkin between your board and any snacks.
- Enjoy and DSIPLAY! – Use your board as much as you but also leave it out as shelf decor. It would also be a beautiful personalized gift.
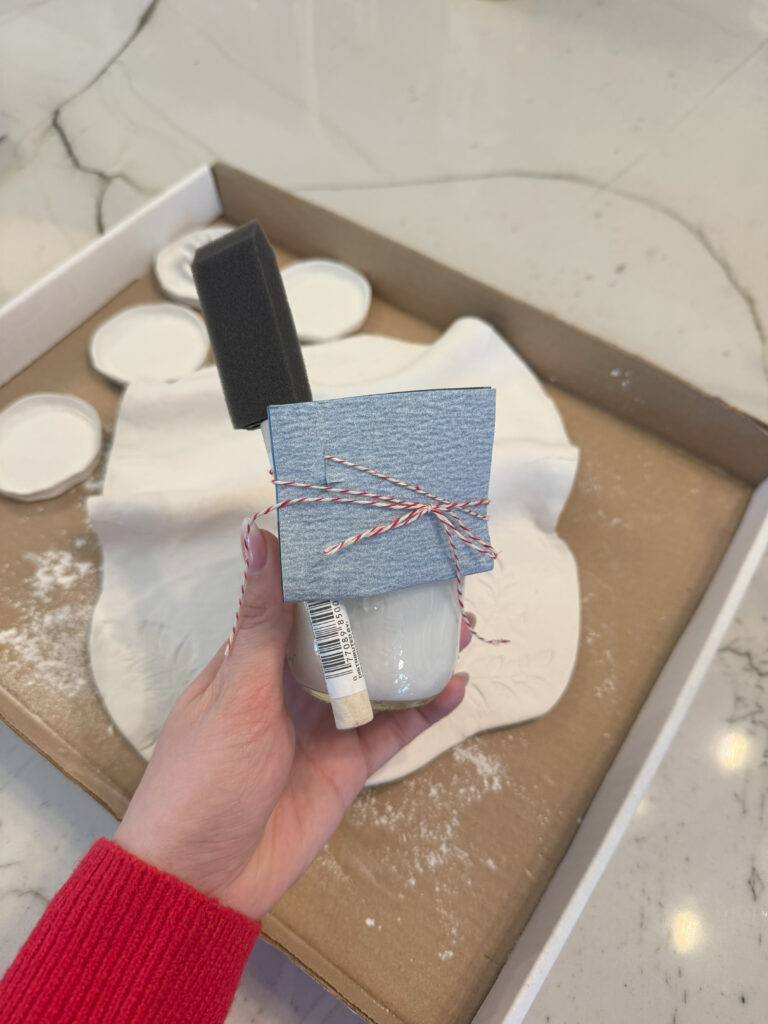
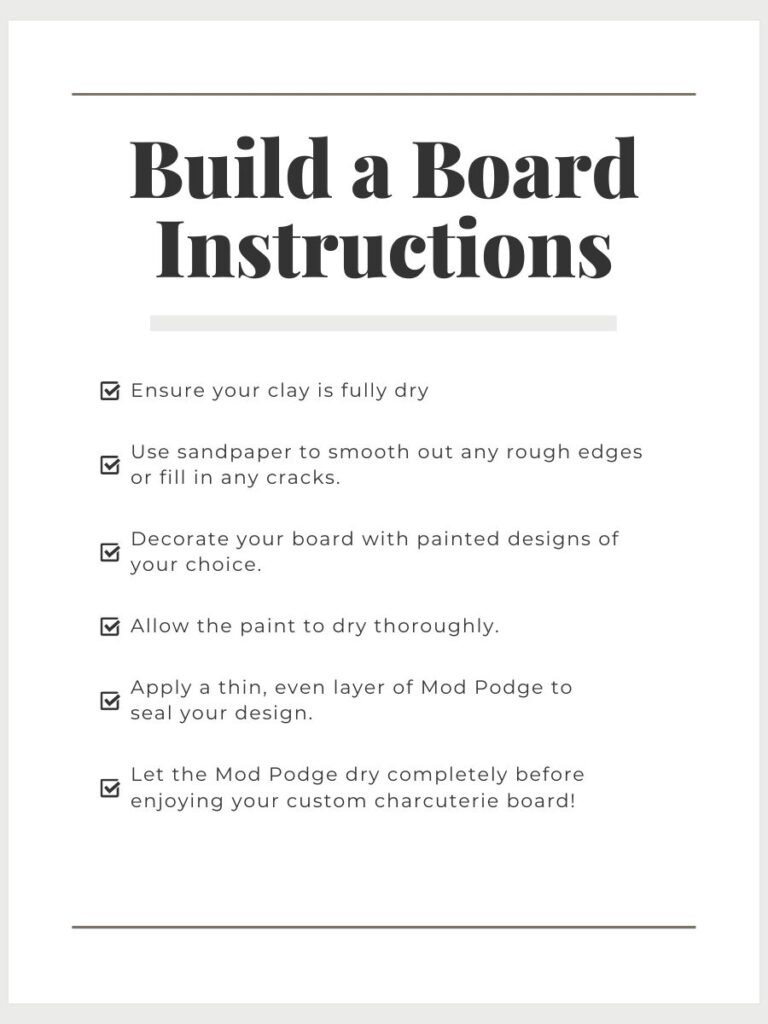
At the end of the night, everyone goes home with a little DIY finishing gift. A mason jar with some Mod Podge, a brush and some fine sandpaper to finish and seal their board once it is dry. We tied them all together with some brown string and added a card with the following instructions.
Wait at least 48 hours for your board to dry before you lightly sand the edges for a nice smooth finish. Wipe it Clean. Apply the Mod podge all over the board; front and back. Use parchment paper in the future when putting food on your board.
Tips for Success
Prep the Clay Stations – Before everyone comes prep everyone’s work space ahead of time if you have the room to separate your craft station from your Potluck Board Station. This gets everyone working right away.
Damp Cloths – Keep wet wipes or damp cloths handy. Clay can be messy and you never know when you might need to go back for a little snack.
Disposable Table Covers – Protect your surfaces with kraft paper or plastic tablecloths. It will make clean up a breeze and adds that crafty vibe.
Label the PotLuck Boards – Use little chalkboards or hand written notes for letting everyone know what each themed board is.
Encourage PotLuck Board Variety – You can give suggestions or have your guests let you know what they’re bringing so that you don’t end up with 5 cheese platters.
Time It Right – Give about 40-50 minutes for the clay activity. You’ll need to decide if this works best before or after eating. If you do it before you eat you’ll have some time for the boards to dry a bit before your guests take them home.
Send Guests with Clear Instructions – Make sure there is a note with your take home Mod Podge kits that explains how to finish their board at home. You can find ours here: https://www.etsy.com/ca/listing/4302546482/diy-charcuterie-board-kit-instructions?ref=listings_manager_grid
Music – Play your Birthday Girl’s favourite music. It is their day. Or play music from the era they were teenagers in.
Photos – I believe so much that we need to document this special time we have with our loved ones. There will be many great moments to capture between the food, the crafts and the laughs.
Amazon Links
Join the Conversation Below
Please show us the boards your people made.
Explore More
Lemon Risotto with Shrimp and Asparagus
Roasted Cabbage with Umami Sauce and Sweetened Soy Drizzle
Lemongrass Margarita: A Modern Take on a Classic
Miami and The Florida Keys – How To Do It All in Under a Week